Showing posts with label Garden. Show all posts

Tuesday, October 7, 2014


My first post in over a year will be on gardening.  I know it's past the end of the summer gardening season, but I've had lots of family and friends ask how we made our garden.  
Here is a before and after photo: 


The process was a relatively long one, taking up several weekends. Some of the steps were done simultaneously and not necessarily in the order below (i.e. we built boxes and dug up sprinklers pretty much simultaneously, since digging up old sprinkler systems and putting in a new one was rather labor intensive). 

First, we mapped out what we had. When we started following where each of the old sprinkler pipes went and we ended up with this: 

After pulling out all the old pipes, we put in new pipes and system, which looks like this: 

In the pictures above, you can see that we did an "H" formation for our sprinkler pipes.  One main pipe going in between the 4 boxes with an outlet at each box.  We also added two outlets on the outside of two of the boxes, to allow watering of the ground outside the boxes, where we would eventually plant squash, melons, and corn. 

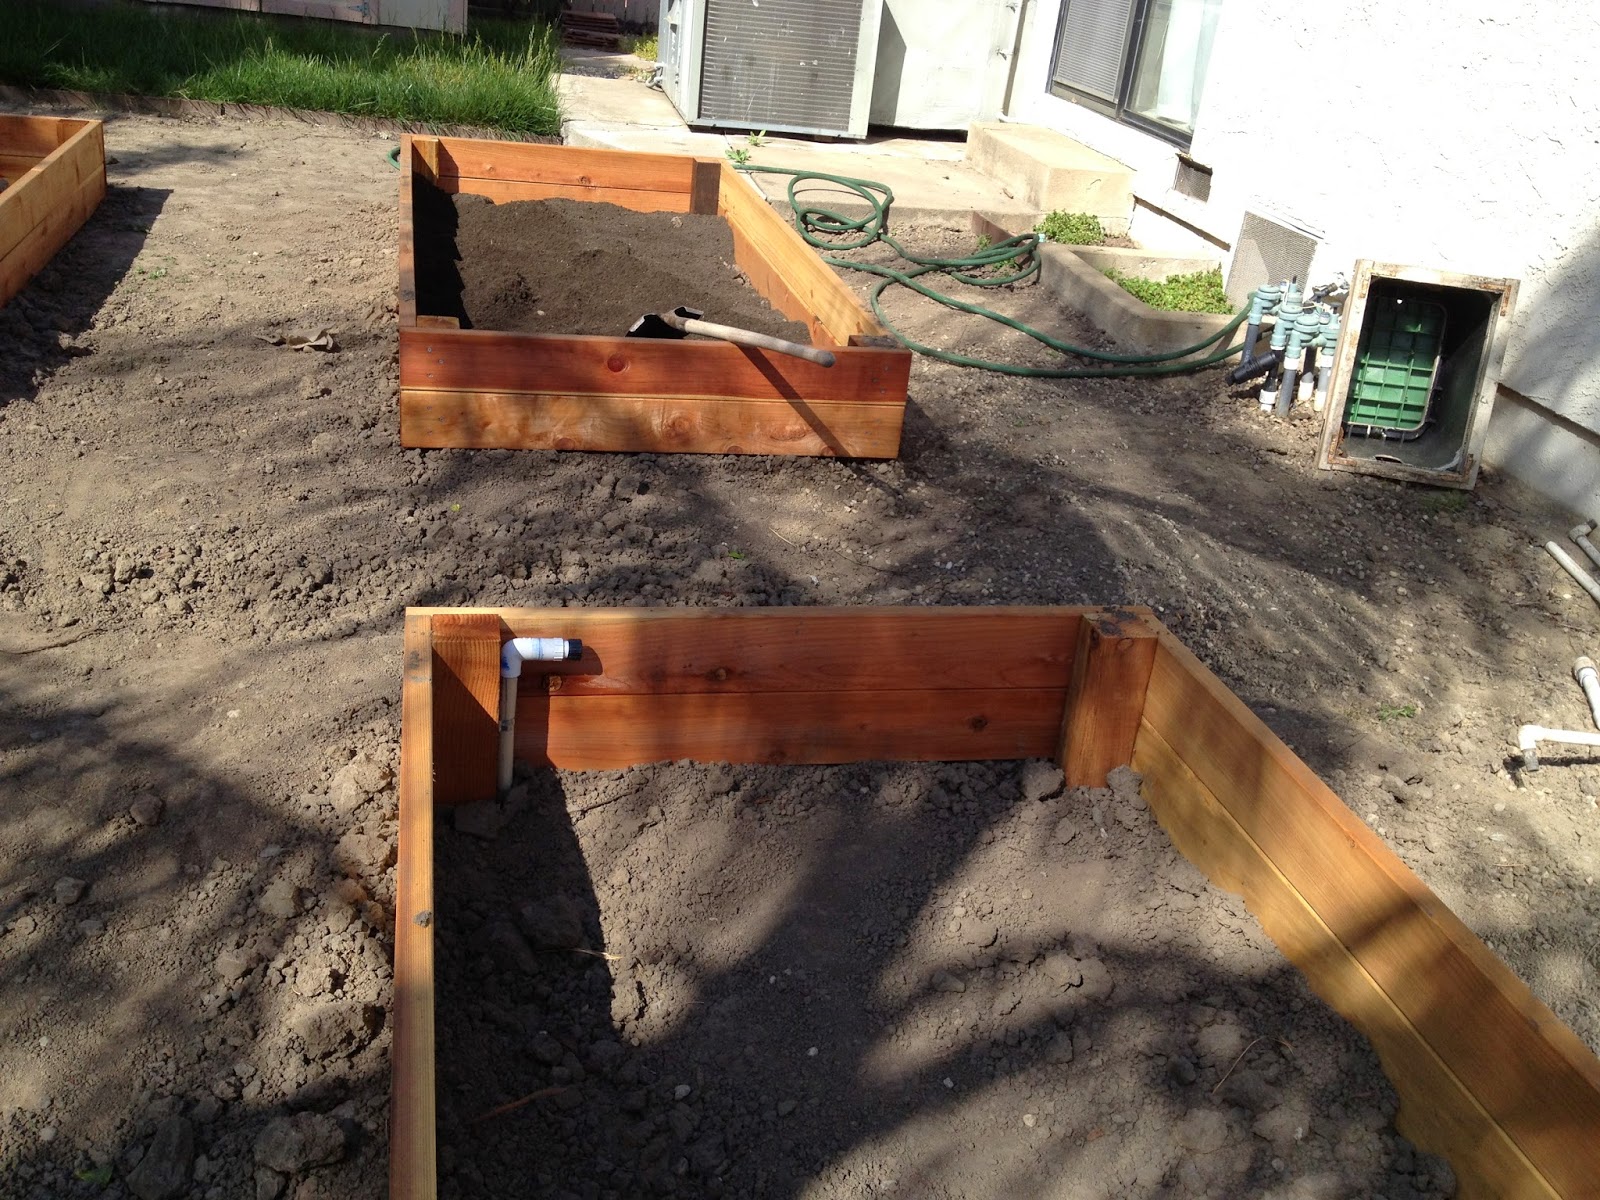
Simultaneous with digging up sprinklers, my handy hubby built the boxes. 
 
All the wood lined up, ready to be assembled. In short, we used this tutorial, with some minimal tweaking. 
We used redwood deck planks, costing about 60 cents per linear foot. 
 Assembly line of all the planks.  The longer ones are 8 feet.  The shorter edges are 4 feet. The planks are 6 inches tall (to make boxes that are 8x4x1).
My feet, stabilizing the post for my handy hubby to drill each plank into. 


This box is upside down.


The 4 boxes, lined up and in position.  The posts go into the ground about 12". This may be a bit excessive as the position of the boxes is pretty set once you have soil in them.  


The boxes are 4' x 8'. They are approximately 30" apart from each other. 


Things to keep in mind: 
  • Level the boxes before putting soil in them. 
  • Make sure that your boxes are equidistant from each other.  You don't want a wonky grid of boxes. 
  • Make sure you have enough room on each side of the boxes to navigate wheelbarrows, tools, lawn mower, etc.  We mapped out the locations of each of the boxes on a paper sketch before deciding how many boxes and the final layout. 
Next step is then to fill the boxes w/ soil. We chose to get planting soil delivered to us (which meant dropped on our driveway). The other pile is mulch, to surround the boxes. 
This step took a full day of wheelbarrow-ing. Be prepared and plan your delivery date accordingly. 

Lastly, you pick your vegetables and plant away! 
 Picture of some small plants in the boxes. In this picture, automatic drip system has not been hooked up yet.
This picture shows the box containing peppers (bottom right in the picture above), after a few weeks and with the watering system attached.  We used a drip system with an emitter at each plant. Tomatoes and peppers got more water (higher flow emitters) and other plants were lower. We also used 360 degree emitters on spikes for our lettuce bed. 


After a few months, watch how they grow. 


 Then, be ready to harvest.  We were so successful, we had to give away a lot of stuff.
Among the things we planted our first year (2013):

  • Tomatoes (6 plants)
  • Snow peas
  • Cucumbers
  • Watermelon
  • Cantaloupe
  • Eggplant
  • Bell peppers
  • Habanero peppers
  • Variety of herbs (about 8 types of Vietnamese herbs + traditional herbs of basil, oregano, thyme, sage)
  • Eggplant
  • Lettuce (3-4 varieties)
  • Strawberries (unsuccessfully - they don't like the extreme heat of Sacramento)
  • Zucchini
Things we planted our second year (in addition to above)
  • Corn (3 varieties - unsuccessfully) 
  • Thai chiles
  • Delicata squash


Tuesday, April 7, 2009

Cleaning up

04.06.09 003
Tiny grape hyacinth blossoms.


Since I was post call and not feeling in the mood to read, I decided to do some cleaning up of my balcony garden. It had grown a little out of control as of late because I have about 3 cubic feet of soil/compost/other, bird netting that was haphazardly put up (to protect my poppies, thyme, and basil from the hungry critters), and random debris everywhere. Now, it's a little more organized and makes me feel better that it's cleaner.

Since I haven't updated with pics of my garden as of late, here you go:

04.06.09 006
My overstuffed vegetable container with zucchini, crookneck, tomato, okra, and beans.

04.06.09 007
Updated herb garden. Mint now has its own pot. Added a basil plant, that I had to cut down because of an aphid invasion (which explains the homemade yellow sticky trap). The wine bottle is there as a self-watering mechanism. I'm experimenting, trying to figure out how to keep my plants alive when I go to Morocco for 2 weeks in June.

04.06.09 005
Of course, I cannot forget my first love - my dwarf meyer lemon tree. There are buds everywhere, but these are the first blossoms. So delightfully fragrant.

Friday, March 20, 2009

Many uses for mint

Here is what I did last night, in hopes of getting rid of the ants:

03.20.09 001

Turns out that it works! When I went to work today, there were a handful of ants, trying to make their way through my mint maze, but now, there are none! None!

I don't know if it was my traps or the mint and salt concoction (literally a handful of freshly picked mint leaves, a handful of salt, ground together into a paste) spread over my entire countertop and cupboards.

Yes, it's a mess to clean up, but it may be worth it for a simple, easy, nontoxic ant deterrent! I'm kind of tempted to keep it up for one more day so that it's there for good measure.

And I'm too lazy to clean it up tonight.

Ants, again!

After spread mint all over my cabinets (what a way to first use my mint from my garden - ground up into a paste and plastered over my cabinets, like I'm protecting my hosue from the plague) last night - pictures to come - the ants are back this morning. 
 
Is it bad that I couldn't bother to get rid of them this morning?  So, they're probably having a field day. 
 

Thursday, March 19, 2009

Hormigas!

Ah, ants!!!  I got home today to a trail of ants. Took my half an hour to clean it up.  Now, as I'm going to bed, I go into my kitchen, and, gasp! another trail of ants - in the same exact place.  How to get rid of them?  I'm going to the hardware store tomorrow and buying all the anti-ants stuff I can. 

Vegetable gardens for everyone!

So, as an extension of my herb garden, I have decided to try my hand at a vegetable garden.  No, I do not actually have any land.  But yes, I have a wonderful south-facing balcony.  Yesterday, after work, I ran to Osh before it closed and got the following: tomato, bush bean, and zucchini plant  I also got some compost, some soil addition, and a tomato cage.  All for $11 buckaroos. 

Now, I just have to get some soil to put into the giant container I got at Target and be on my way.  I'm afraid that my container may be too shallow, but we'll see if it works.  If not, not a big deal. 

On a related note, the First Family has also decided to grow a vegetable garden.  Albeit, they have 1,000 square feet to do so (compared to my 20 square foot balcony).  I will post pictures as soon as I get going.

Wednesday, March 11, 2009

Broken hearted

My beautiful Meyer Lemon Tree, which is fortunately thriving and not losing any of its leaves (which apparently, if you Google "Meyer Lemon Tree help", you'll find that's a common problem), is going to break my heart.  After losing the last 3 blossoms today (due to the lightest touch of me moving the container), I was broken hearted.  When am I going to get lemons?  After much web (and soul) searching, I found out it might not be for a few years.  Years?!  No one told me that when I bought that tree! 

The good news is that it's growing new shoots, leaves, and even flowers.  That means I'm doing something right, right?

On another heartbreaking note, I realized that my ranunculus needs more water than I previously thought.  I came back from my test today around 3 and my plant was all wilted.  Completely wilted.  Flowers fallen to the side, leaves unable to stand upright.  Sad.  Then I watered it.  And now it's back to life.  Whew, close call.

Sunday, March 8, 2009

Someone stop me

03.08.09 002 03.08.09 006

As motivation for myself to get up earlier today, I said that I would get to the Farmer's Market at 9am (even with the time change!) and give myself an hour to shop, then back to studying for the boards. Albeit, I was a little delayed (got to the market at 9:20), but it was still worth it. I ended up buying not one, but two (yes, two!) new plants. Not just cut flowers. Actually plants. One orchid (which I really shouldn't have bought since my mom just gave me a new orchid last week, but I couldn't help it - how often does one find a beautiful pot of orchids with two strong, beautiful stems?) and one pot of ranunculus (ranunculi?). I need to stop. My balcony is starting to look like one of those crazy lady balconies with plants and plants and plants.

Tuesday, February 24, 2009

Garden updates!

I have updates! I have neglected my garden as of late but thankfully they have not suffered because of the wonderful rain we have been getting.

Here are my orchids, which I stuck into an old orchid pot and suddenly, there's a sprout!
02.24.09 002

And here are my bulbs (crocus and hyacinth) - their progress in the last week has been amazing.
02.24.09 003

On that note, my mint has been growing out of control, so I decided to put it all into a different pot. Rumor is, on the garden blogs, that mint can grow out of control and they recommend potting it separately. So, in place of the mint, I planted some parsley and lavender. We'll see how long it takes for them to come up.

However, after repotting the mint, I realized I have a lot, so I placed some into smaller pots to distribute to friends. Anyone want some minty freshness?

Sunday, February 8, 2009

Updates on the garden

I'm so excited. I haven't checked on my balcony garden in a few days and when I went out there yesterday, alas, look at what I found!

02.07.09 017

Yup, those hyacinth bulbs that I planted just over a week ago have actually emerged from the ground! I'm so beyond excited. I'm still waiting for the crocus bulbs to show their faces, but I can be patient. And, if you look closely at the picture, you will see little sprouts - those are Flander's poppies. I may have spread too many (I didn't think they'd take), so we'll see if they overwhelm my garden. Hehe.

Now, I can't wait until my lemon blossoms fall off and little lemons start coming out.